Audi MMI 3G Plus Aftermarket Subwoofer Installation
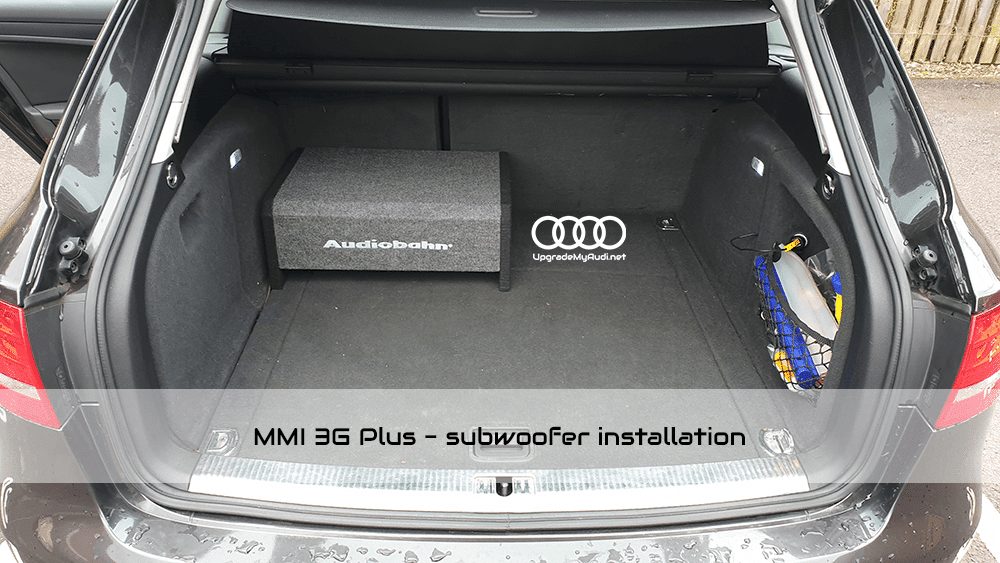
This guide explains how an aftermarket subwoofer was connected to an Audi equipped with MMI 3G Plus and the standard factory sound system.
Important: the connection described below is intended for a standard audio system without Bose or Bang & Olufsen. Premium sound systems use different amplifiers and wiring configurations. Do not use the pin numbers from this guide on a Bose or Bang & Olufsen system without checking the correct wiring diagram for your vehicle.
What you will need
For this installation, you will need:
- a high-level to low-level RCA converter,
- an aftermarket amplifier and subwoofer,
- suitable wiring and connectors,
- basic trim-removal tools,
- tools for removing the factory amplifier bracket,
- a multimeter for verifying power and signal connections.
The RCA converter changes the factory speaker-level signal into a low-level RCA signal suitable for an aftermarket amplifier.
Locate the MMI 3G Plus amplifier
The factory MMI amplifier is located in the luggage compartment, behind the trim panel on the left-hand side.

Before working on the electrical connectors, switch off the ignition and allow the infotainment system to shut down. If you disconnect the vehicle battery, follow the appropriate battery-disconnection procedure for your Audi.
Remove the factory amplifier assembly
Remove the three screws securing the factory amplifier assembly.


Once the screws have been removed, carefully pull the complete assembly out far enough to access its main connector. Avoid stretching or damaging the factory wiring.
Disconnect the main amplifier connector
The pin numbers are marked on the rear of the connector, so removing the connector makes it easier to identify the correct terminals.
There is a locking lever underneath the plug. Release and pull the lever to disconnect the plug from the amplifier.


Do not pull the connector out by its wires.
MMI 3G Plus amplifier pinout
Use the existing pinout diagrams to identify the speaker and subwoofer connections.


The following connector image shows how the pins are arranged on the physical plug.

For the standard audio configuration shown in this installation, the RCA high-level converter is connected to:
- pin 9 — positive signal (+),
- pin 13 — negative signal (−).
Check the numbers moulded into the connector before making any connection. Audi wiring can differ between equipment variants, model years and sound systems. If the connector or wiring in your vehicle does not match the photographs and diagrams, stop and obtain the correct wiring diagram for that vehicle.
Connect the RCA converter
Connect the high-level input of the RCA converter to pins 9 and 13.

In this installation, custom crimp connectors were used. This makes it easier to disconnect the added wiring later without permanently modifying the factory installation.

Make sure every connection is secure and properly insulated. The added wiring must not place tension on the original connector or prevent its locking mechanism from closing correctly.
Reconnect the factory system
Reconnect the main plug to the factory amplifier and secure its locking lever. Position the RCA converter and wiring so they cannot rattle, rub against sharp metal edges or interfere with the luggage-compartment trim.

The RCA output can now be connected to the input of the aftermarket amplifier.
Amplifier power and remote signal
This guide focuses on obtaining the audio signal from the factory system. The aftermarket amplifier still requires a correctly sized power cable, ground connection, fuse and remote turn-on signal.
The battery is located in the luggage compartment on many compatible Audi models, which can simplify the amplifier power connection. Install a correctly rated fuse close to the battery’s positive terminal.
In the documented installation, the remote turn-on signal was taken from the 12-volt socket on the right-hand side of the luggage compartment. Verify the circuit with a multimeter before using it because socket behaviour can differ between vehicles. Use this connection only as a low-current remote trigger—it must not supply power to the amplifier.
Test the installation
Before reinstalling the trim:
- Check that all factory connectors are fully locked.
- Verify that the amplifier’s power cable is fused correctly.
- Switch on the MMI system and test the factory speakers.
- Confirm that the aftermarket amplifier turns on and off correctly.
- Test the subwoofer at a low volume.
- Adjust the RCA converter and amplifier gain gradually.
- Check for distortion, unwanted noise or battery drain.
Do not use amplifier gain as a volume control. Excessive gain can introduce distortion and damage the subwoofer.
Compatibility summary
This procedure was documented on an Audi with MMI 3G Plus and the standard factory audio system.
It should not be treated as a verified wiring guide for:
- Bose sound systems,
- Bang & Olufsen sound systems,
- vehicles with a different factory amplifier,
- connectors that do not match the photographs,
- other MMI generations.
For those configurations, identify the exact amplifier and obtain the correct vehicle-specific pinout before connecting an RCA converter.


2 comments
Does this only work for bass replacement, or will the amplifier also play high tones such as midrange and treble if you connect the speaker to the amplifier
You can use it also for high and mid tones but i do recommend connect RCA converter with different pins rather than just for bass lane.
Sign in or create an account to leave a comment →